PROJECT STORY / CRAWLRemoving mold. Bringing moisture under control.
This crawl-space job involved much more than laying down a white liner. We removed mold, dried the space, applied a protective coating and installed ongoing humidity control beneath the home.
Read the project story
What we found beneath the home
The close photographs show the foundation surfaces, framing and utility lines in a confined working space. Onsite, we found mold and excess moisture. The homeowner may rarely see this part of the house, but it deserves the same care as the rooms above it.
Removal and drying came before the finish
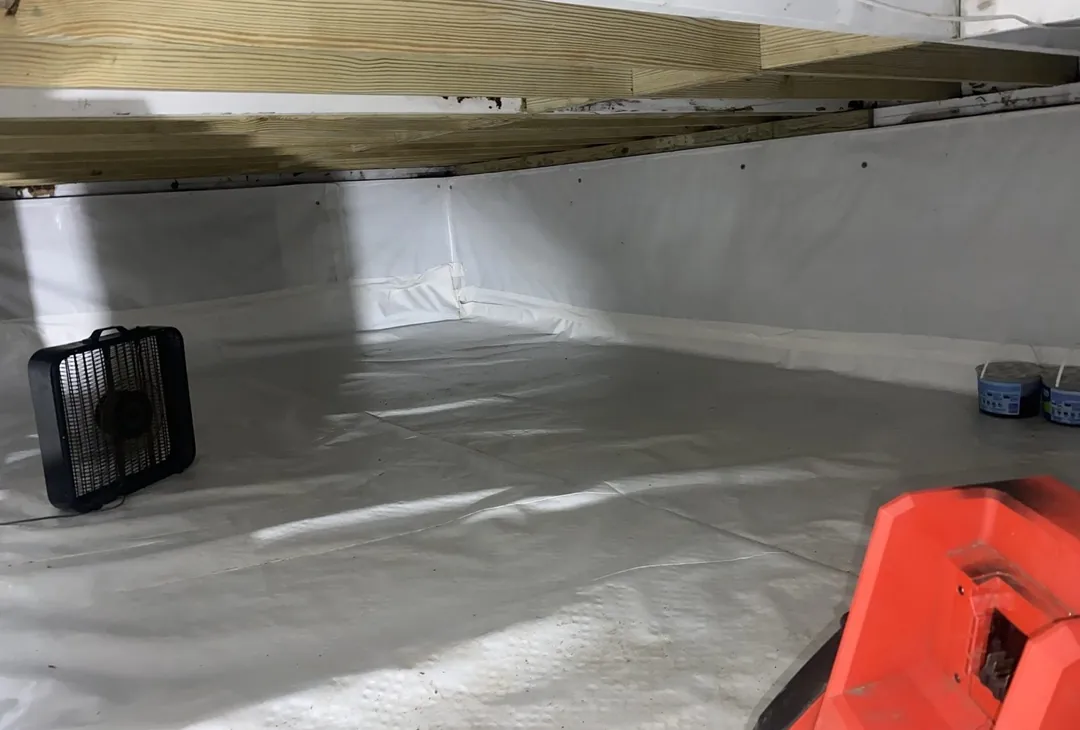
We removed the mold and then fogged the space. Fans and temporary dehumidifiers were used to dry the area before the coating and new vapor barrier were installed. That preparation mattered: the surfaces needed to be dry enough for the coating and barrier attachment to adhere properly.
Coating, vapor barrier and ongoing moisture control
After cleaning and drying, we applied a white mold-resistant coating and installed a new vapor barrier. The wider photographs show the liner coverage across the ground and along the foundation walls, fitted around the existing utilities. We also installed a Santa Fe crawl-space dehumidifier, with its condensate drain routed directly into the sump pump basin.
Why the whole job matters
Mold needs moisture to grow. Removing existing growth addresses the contamination; controlling moisture helps reduce the conditions that allow it to return. Mold can damage the materials it grows on and can trigger allergies or irritation in some people. Cleaning and drying must come before coating—painting over mold does not replace removal.
The vapor barrier helps limit moisture entering from the ground, while the dehumidifier removes moisture from the air. Its drain carries the collected water to the sump basin. These components serve different purposes and need to keep working together.
What to watch afterward
Recurring musty odors, new growth, condensation or standing water deserve another inspection. Keep the dehumidifier maintained, its drain clear and the sump pump operating. Moisture can also come from leaks or water entering around the foundation, so a barrier and dehumidifier do not replace fixing an active water source.
Homeowner guidance: EPA guide to mold and moisture.
A cared-for entrance starts below the door handle.
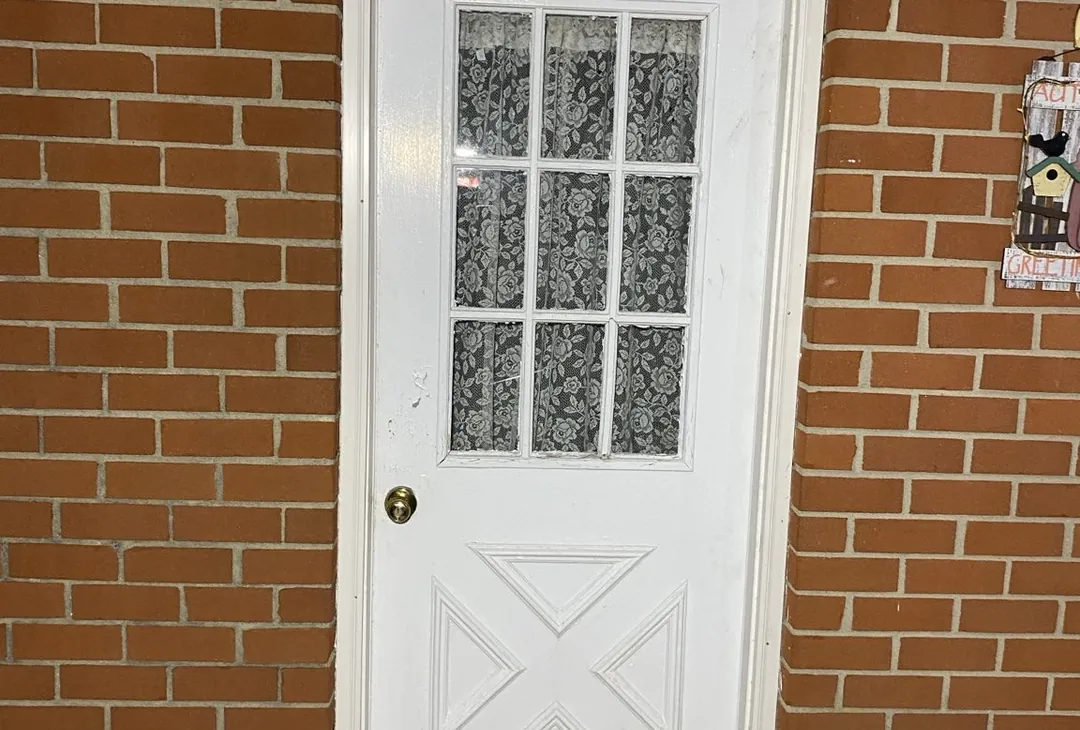
The bottom of a doorway takes years of weather and daily use. Here, attention to a deteriorated lower opening led to a renewed white exterior door in the existing brick entrance—an everyday part of the home given the attention it deserved.
Read the project story
What the close-up photographs reveal
The first three photographs bring the problem into focus: peeling white finish, broken-down material at the bottom of the jamb, and debris where the frame meets the metal threshold. The inside view shows why a wide picture of a doorway can miss the area that needs the most attention. This was more than a tired-looking coat of paint; the lower opening showed visible deterioration.
Why that lower corner deserves attention
Repeated wetting and failed protective finishes can contribute to deterioration at an exterior doorway. Gaps at the frame, worn seals and a poorly fitting threshold can also allow drafts or water entry. Those are reasons to examine the whole opening when damage appears. The exact route of any water entry and the condition behind the visible trim require an onsite assessment.
The work and the result shown
Our project photographs move from those lower-jamb and threshold details to the installed white exterior door, set within the existing brickwork. The finished views show the divided-glass upper section, lower panel, surrounding trim and threshold together. Keeping both the close-ups and the full entrance in the record lets a homeowner see the original concern and the resulting doorway, rather than only a polished final picture.
The benefit reaches beyond appearance
A doorway needs to serve the people using it every day: entering with groceries, letting a pet out, or securing the home at night. A sound opening, suitable seals and a door that closes and latches properly all matter. The finished appearance is one part of that picture; fit, water management and the surrounding materials deserve attention too.
What a homeowner can watch afterward
Look for returning peeling finish near the bottom corners, dampness after rain, daylight around the closed door, or a change in how it opens and latches. Catching a small problem early gives you a chance to address the source before more of the opening is affected. Seasonal checks of the finish, weatherstripping and threshold help keep a frequently used entrance on the maintenance list.
Homeowner guidance: Exterior-door maintenance guidance from Boise Cascade Millwork.
The details that matter above a sheltered porch.
A porch roof should be part of caring for the home, even when its surface is mostly out of sight. This project follows weathered metal panels and worn seam details through to a white-coated finish, with close photographs of the junctions that can be easy to overlook.
Read the project story
What the earlier photographs show
The close views show aged sealant at panel joints, stained and weathered surfaces, and a visible opening in old material at the roof-to-wall junction. Wider photographs place those details beside the adjoining shingle roof. A separate view records the gutter outlet and downspout connection beneath the porch edge. Together, the photographs show the roof as a set of connected details rather than one flat surface.
How wear can become a water-entry concern
A metal roof includes panel joints, fasteners and connections to adjoining walls or roofing. Over time, exposed finishes and sealants can deteriorate, and attachment points may need attention. Those interfaces can become possible paths for water. A stained seam alone does not locate a leak: the roof, its junctions and the interior signs need to be considered together.
The work recorded in the photo sequence
The work-stage view shows white material applied along a joint, with tools and materials on the roof. The later photographs show a white-coated metal surface, including the raised seams and the adjoining wall area. Several angles record the broad panels and the smaller junction details. The work presented here is seam and surface treatment of the existing porch roof.
Why the underlying details still matter
A coating is part of a roof system; it does not remove the need for sound joints and suitable repairs underneath. Water that gets through a roof can affect materials below the visible surface before the full extent is obvious inside. That is why the condition of seams and transitions deserves attention alongside the overall finish. The appropriate preparation, repairs and coating must suit the existing roof and the chosen product.
What to watch after roof work
From the ground and inside the porch, watch for new staining, damp spots after rain, loose material or recurring drips. Arrange an inspection when a concern returns, and after a storm if there are signs of damage. Keep drainage concerns on the list too. A check after rainfall is useful follow-through; these photographs record the visible finish, while leak performance needs observation under actual weather conditions.
Homeowner guidance: Metal-roof coating and seam guidance from the Roof Coatings Manufacturers Association.
Making room around a home, with the setting in view.
Property work happens where people live, walk and spend time outside. This project follows a tree beside a home through removal stages to a cut stump and gathered branches, with the house, road and surrounding work area kept in the photo record.
Read the project story
What the initial views tell the story of
The first photographs show the standing tree close to the home and its canopy above the surrounding yard. Other views include the road, overhead lines and the relationship between the tree and the building. These details explain the setting of the job. They do not establish that the tree was diseased or that work on utility lines was part of the service.
Why location is part of the work
A tree can provide shade and character while also needing attention because of its condition, growth or location. When branches or a tree fail near a house or a place people use, the consequences can extend to roofs, siding, vehicles or personal injury. Whether a particular tree presents that concern needs an appropriate assessment; its appearance in a photograph is only part of the information.
The progress captured on this property
The later-stage photograph shows the cut stump beside the home, with cut branches gathered nearby. The final two views show branches brought together along the roadside grass. This gives the project a clear visual progression: the original tree and its surroundings, the remaining stump, and the material gathered after cutting. The photo record ends at that gathered-branch stage; final disposal is a separate part of the job record.
The visible work and what can be harder to see
Broken limbs, cracks and changes in a tree’s lean can be visible reasons to seek an assessment. Root problems or internal decay may be less obvious. A property owner should not have to guess from the ground whether a tree is sound. A qualified arborist can assess concerns, and work involving electrical lines belongs with the utility and appropriately qualified professionals.
Caring for the space afterward
Keep the remaining stump and any staged branches in mind when using or maintaining the yard. Stump removal, grinding, final haul-away and ground restoration each need to be included in the agreed scope when wanted. Continue looking over nearby trees, particularly after damaging weather, for fresh cracks or broken and hanging limbs. Caring for the property includes both the completed cutting work and planning what the space needs next.
Homeowner guidance: Tree-condition and inspection guidance from University of California IPM.